Tuesday, September 27, 2011

Brown Sugar Bonanza


Got my bake on today. I've been itching to try a new recipe for brown sugar pound cake and see if I could translate it into a cupcake cooking time without it drying out. They turned out amazing! Then I topped them off with brown sugar butter cream...seriously so good I want to marry it. But wait there's more! I topped that with a brown sugar cinnamon drizzle. Utter deliciousness. These are definitely a cupcake worthy of a grown up party but the kids liked them too. They are really complex in flavor and sweet. The perfect partner to a strong cup of coffee.

I found the recipe online at Boston.com. I'll share it with you and include the edits I made for myself.

3 cups flour

1 teaspoon baking powder

¼ teaspoon salt

¾ cup (1 ½ sticks) unsalted butter, at room temperature

2 cups light brown sugar

3 eggs

1 tablespoon vanilla extract

1 cup milk


1. Set the oven at 350 degrees.

2. In a bowl, whisk the flour, baking powder, and salt to blend them.

3. In an electric mixer, beat the butter and sugar until creamy. Beat in the eggs, one at a time, scraping down the sides of the bowl several times. Mix in the vanilla.

4. With the mixer set on low speed, add the flour mixture alternately with the milk in 3 additions, beating just until combined. Pour the batter into the pan and smooth the top.

5. Bake cupcakes 18-20 minutes or until they spring back when touched.

Brown Sugar Butter Cream
1 1/2 sticks butter room temperature 1 C brown sugar packed 1 teaspoon vanilla approximately 1 pound powdered sugar pinch of salt 3-4 tablespoons milk

beat together butter and brown sugar to within an inch of its life
beat in vanilla and salt
add powdered sugar and milk
beat until smooth light and fluffy.
Frosting will still be somewhat grainy because of the brown sugar but trust me it's fine. You'll hardly notice when you stuff that whole cupcake in your mouth LOL

Brown Sugar Cinnamon Drizzle
mix brown sugar a sprinkle of cinnamon and a little water to a somewhat smooth consistency. It won't be liquid, still grainy but fluid. Drip over tops of cupcakes.

Thursday, September 15, 2011

Mummy Juice

Got my craft on yesterday. I've said it before and I'll say it again. I LOVE A THEME! So sticking with the mummy theme I've decorated juice boxes for the kids to enjoy at the Halloween party. Yes it's over a month out but seriously I'm so busy in October that what doesn't get done in September just doesn't get done. So it's highly likely you'll be seeing some more Halloween ideas in the weeks to come.


This project started with a bunch of juice boxes. Had I thought it out more I would have looked for one with green labeling or something because I ended up having to create a cardstock sleeve for these because the red showed through the masking tape so much. Never fear tho it's not too tough. Basically I used some scrap cardstock in a light mummy-ish color and cut it 4" wide and wrapped it around the box. Didn't even bother scoring. Then I wrapped that with as much masking tape as it needed to get covered and look scary (hahaha hardly). Then to kick up to real mummy status I sponged River Rock all over making sure to really rub it in to the edges of the masking tape. I think it takes it to the next level.


Next came the eyes. Once again had I thought this through I likely would have put the eyes in then added a little masking tape "gauze" over them too. Eh live and learn. I mean it's not like the kids mind or are going to throw these away after sucking up the juice right? I used Wild Wasabi for the eyelids and the same cardstock as the underneath for the eyes. The iris is Soft Sable. I sponged (of course) all around the eye then used a glue dot to attach them to the box. I think they look just silly enough to be perfect.

Monday, September 12, 2011

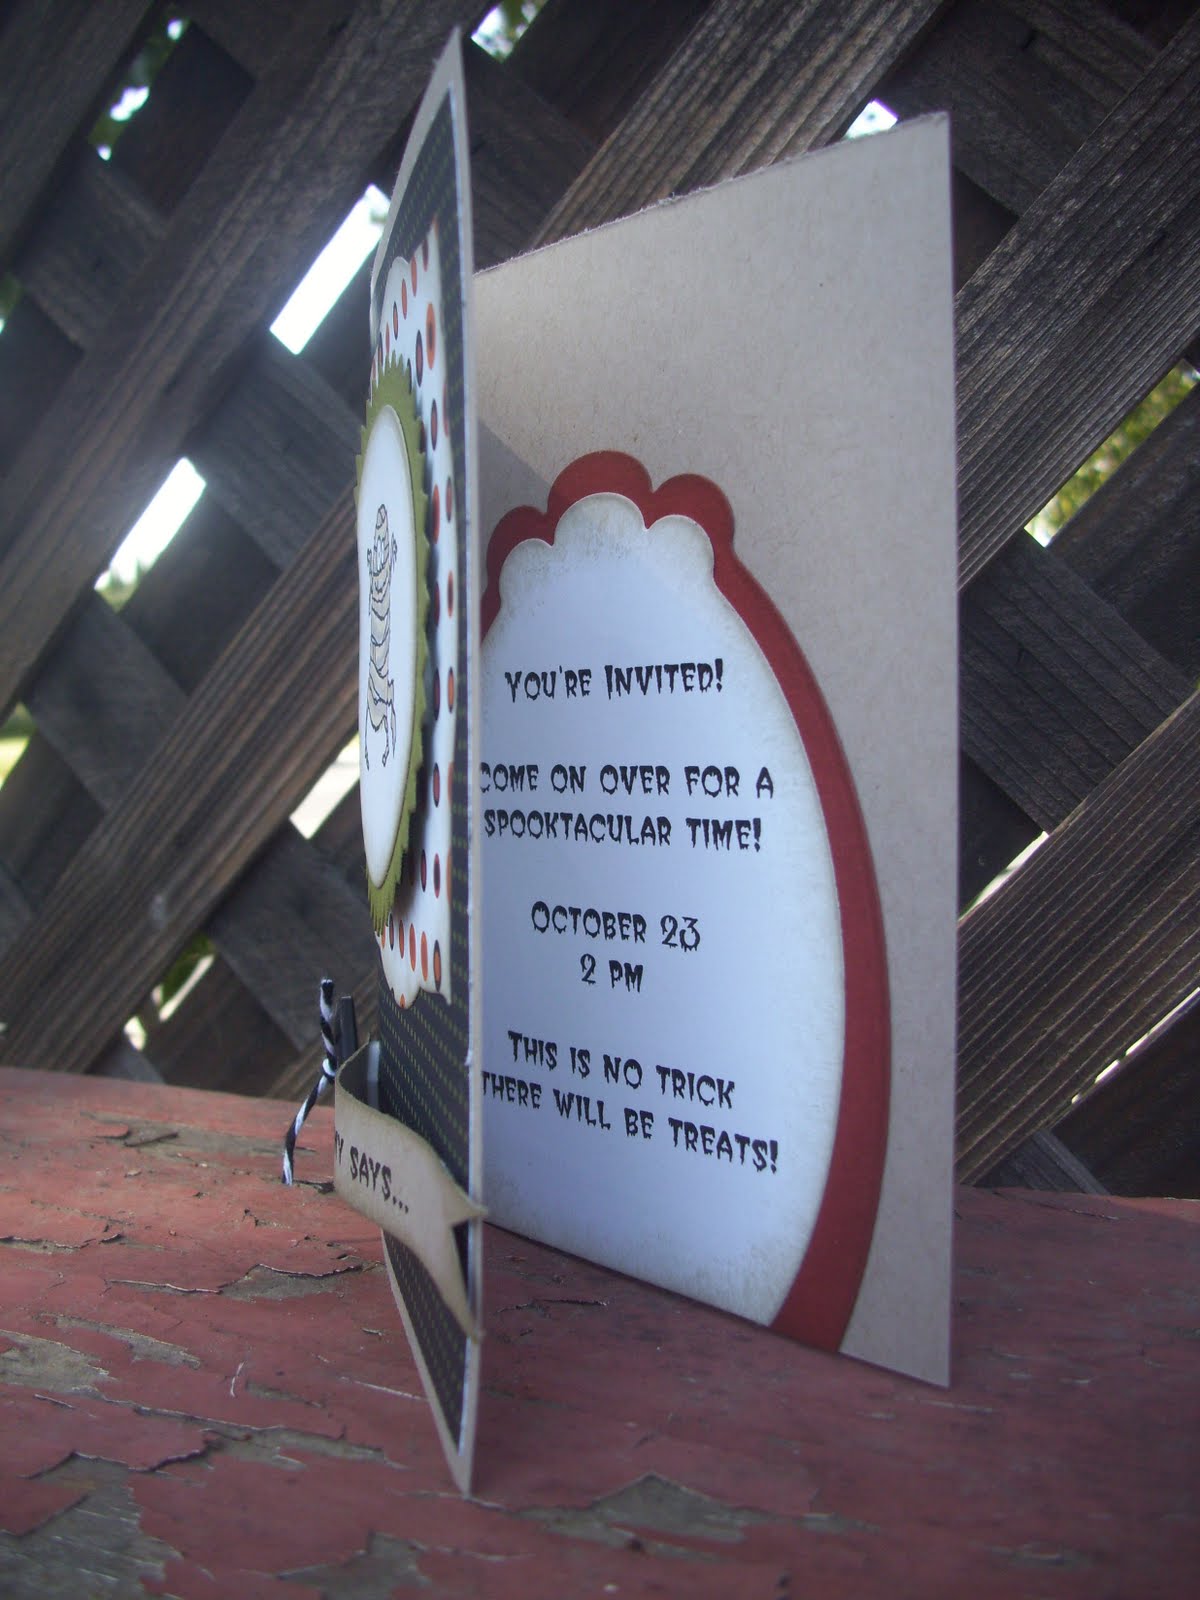
Mummy Trio

Because I love my kids and their friends and (more honestly) because I love a theme party I've decided to have a Halloween crafting and cookie decorating party for a few kids and their parents. The kids will be decorating homemade sugar cookies and crafting macaroni necklaces while the parents eat uncontaminated sugar cookies and craft cocktails.

I busted out my most favorite Halloween set for the invitations. Booglie Eyes just makes me smile. And I loved coloring the mummy with my Copics. I'm still practicing with them so this was a nice way to see what would happen if...
What would happen if I layered Y21 with W3 and then added a little G12 around the eyes and hands and feet. Then I wanted to see what would happen if I layered the colorless blender over it all. Pretty darned cute I'd say.

The font is a free download from www.dafont.com. Lots of fun stuff there. My six year old says the writing isn't scary enough. I think it's perfect. Reminds me of the old horror flicks.

These are just going to be handed to the kids so there was no need to worry about them fitting in an envelope. I made each a little different because, well, because I can LOL. And as usual the layers are all sponged with Crumb Cake ink and so are my fingers.

Thursday, August 11, 2011

I'm a Romantic


Yeah not really but the card is.
Yep I got my craft on today! Two days in a row! Clean clothes? Meh who needs those?

This is made with yet more Cosmo Cricket paper and sponging. Not surprised are you? The image is from Because I Care. I stamped it Soft Sable and then colored with some Prismacolor pencils. I used the outside the box technique with the Nestability (first time) and really like it. That piece was sponged with Crumb Cake in. I finished it all off with some crumb cake seam binding and a button.

Wednesday, August 10, 2011

Blowin in the Wind


Got my craft on THIS MORNING! And then I actually took a picture of it and am sitting here writing a blog post! Will wonders never cease?

Anyway here's the fun little card I made. I really like it. For the balloons I stamped them then stamped the image again on a post it and cut out the uninked portions so I could use it as a mask on the first image. I masked it off and sponged, ok Q Tipped, Crumb Cake ink into the spaces to give it a little dimension. The edge of the cloud paper and clouds are sponged in Crumb Cake too.

Thanks for stopping by.

Sunday, August 7, 2011

Two Firsts!


I got my craft on the other day. I'm attempting to teach myself how to color with Copics. What I've learned so far is I need more colors ;-)

I tried to start out easy and opted for a spray of flowers, this one from Elements of Style is a fave, and let my marker colors dictate where the card went from there. So that leads me to my second first...Peach Parfait. It's an In Color from last year and this is the first time I've used it. But it went really well with the colors of the flowers (Y23, Y17, R30) and I like oranges playing off cool blues (Pool Party this time).

Saturday, July 30, 2011

Up, Up & Away


Got my craft on yesterday. This is one of those cards that start out with a general idea and I just let it lead me where it wants to. I like how it ended up. I mean who wouldn't? There's sparkle, buttons and TWINE!

The printed paper is from the Welcome Neighbor paper pack from Sale-a-Bration awhile ago. It was just too perfect not to use. The balloons were stamped in Pumpkin Pie on Daffodil Delight and then I cut them out. I wanted a little pop of green in there somehow so I made the baskets Lucky Limeade. The glittery clouds are die cut from a Christmas card I got last year and saved. I think it all turned out pretty cute.